Build > Reference
Technical details of CHT app components for app developers
Guides for writing automated tests for CHT applications
This tutorial takes you through testing the various configurable components of CHT applications using cht-conf-test-harness.
Complete the following tutorials:
Testing your CHT application is important as it ensures you are consistently maintaining your application and defining implementation requirements. Testing also helps the user make better architectural decisions, optimizes the forms, tasks and other components of the application. Although it may seem tedious, testing your application ensures that you quickly discover issues that are introduced with changes or newer commits.
CHT applications are greatly configurable. Depending on the number and complexity of app components, it can take a lot of time and effort to test the components manually. Some components, such as tasks, behave differently over time and are particularly challenging to test. As the project evolves, the configuration is often updated with new components and changes are made to the existing components. After each change, you need to test not only the new components, but also the old ones to make sure that the app works as expected. To facilitate the testing process, app builders are encouraged to write automated tests for their app using cht-conf-test-harness.
Because it may be complicated to test with a real application, cht-conf-test-harness (also simply referred as harness), provides a platform that simulates the CHT application instance.
Using cht-conf-test-harness, you can write tests and run them with Mocha testing framework to test the behavior of different components in a CHT application. Mocha works with a variety of assertion libraries including chai, should.js, expect.js, better-assert, unexpected among others.
Writing tests for CHT apps requires a good understanding of the project workflows and requirements. To test using the harness, there are a few things you need to set up:
From the previous tutorials, you should have a functioning CHT instance with cht-conf installed locally and a project folder set up.
cht-conf which is short for CHT app configurer, is a command-line interface tool used to manage and configure your CHT apps. It is used for backup, conversion, validation, uploading and other actions which can be found by running cht --help.
Ensure your package.json file has the required libraries. A package.json file is used to record important metadata about a project and defines functional attributes that npm uses to install dependencies and run scripts. This file should be at the root of your project folder.
If your package.json file does not already have them, add cht-conf-test-harness, chai, and mocha by running this in your command-line:
npm install --save-dev cht-conf-test-harness chai mochaAlso, add the following scripts to package.json, if not already present:
"scripts": {
    "test": "npm run compile-forms && npm run compile-app-settings && npm run unittest",
    "compile-app-settings": "npx cht --no-check compile-app-settings",
    "compile-forms": "npx cht --no-check convert-app-forms convert-contact-forms",
    "unittest": "mocha test/**/*.spec.js --timeout 20000"
  }
After adding these scripts, you are able to run the tests by running one of these commands from the command-line:
| Command | Description |
|---|---|
npm run test | Compiles the app settings, converts the forms,then runs the tests (preferred solution). |
npm run unittest | Only runs the unit tests. |
You can also run the test on a specific form by defining a test under the scripts section.
For example, to run the test on the death.spec.js file, define the test as death-form-unit-test: "mocha test/forms/death.spec.js --timeout 20000". Then run:
npm run death-form-unit-testnpm also supports a shorter alias as npm test. There are recommended conventions on how to arrange tests by splitting into unit tests and integration tests so that each of them can be run independently. This can be best illustrated by this project code.
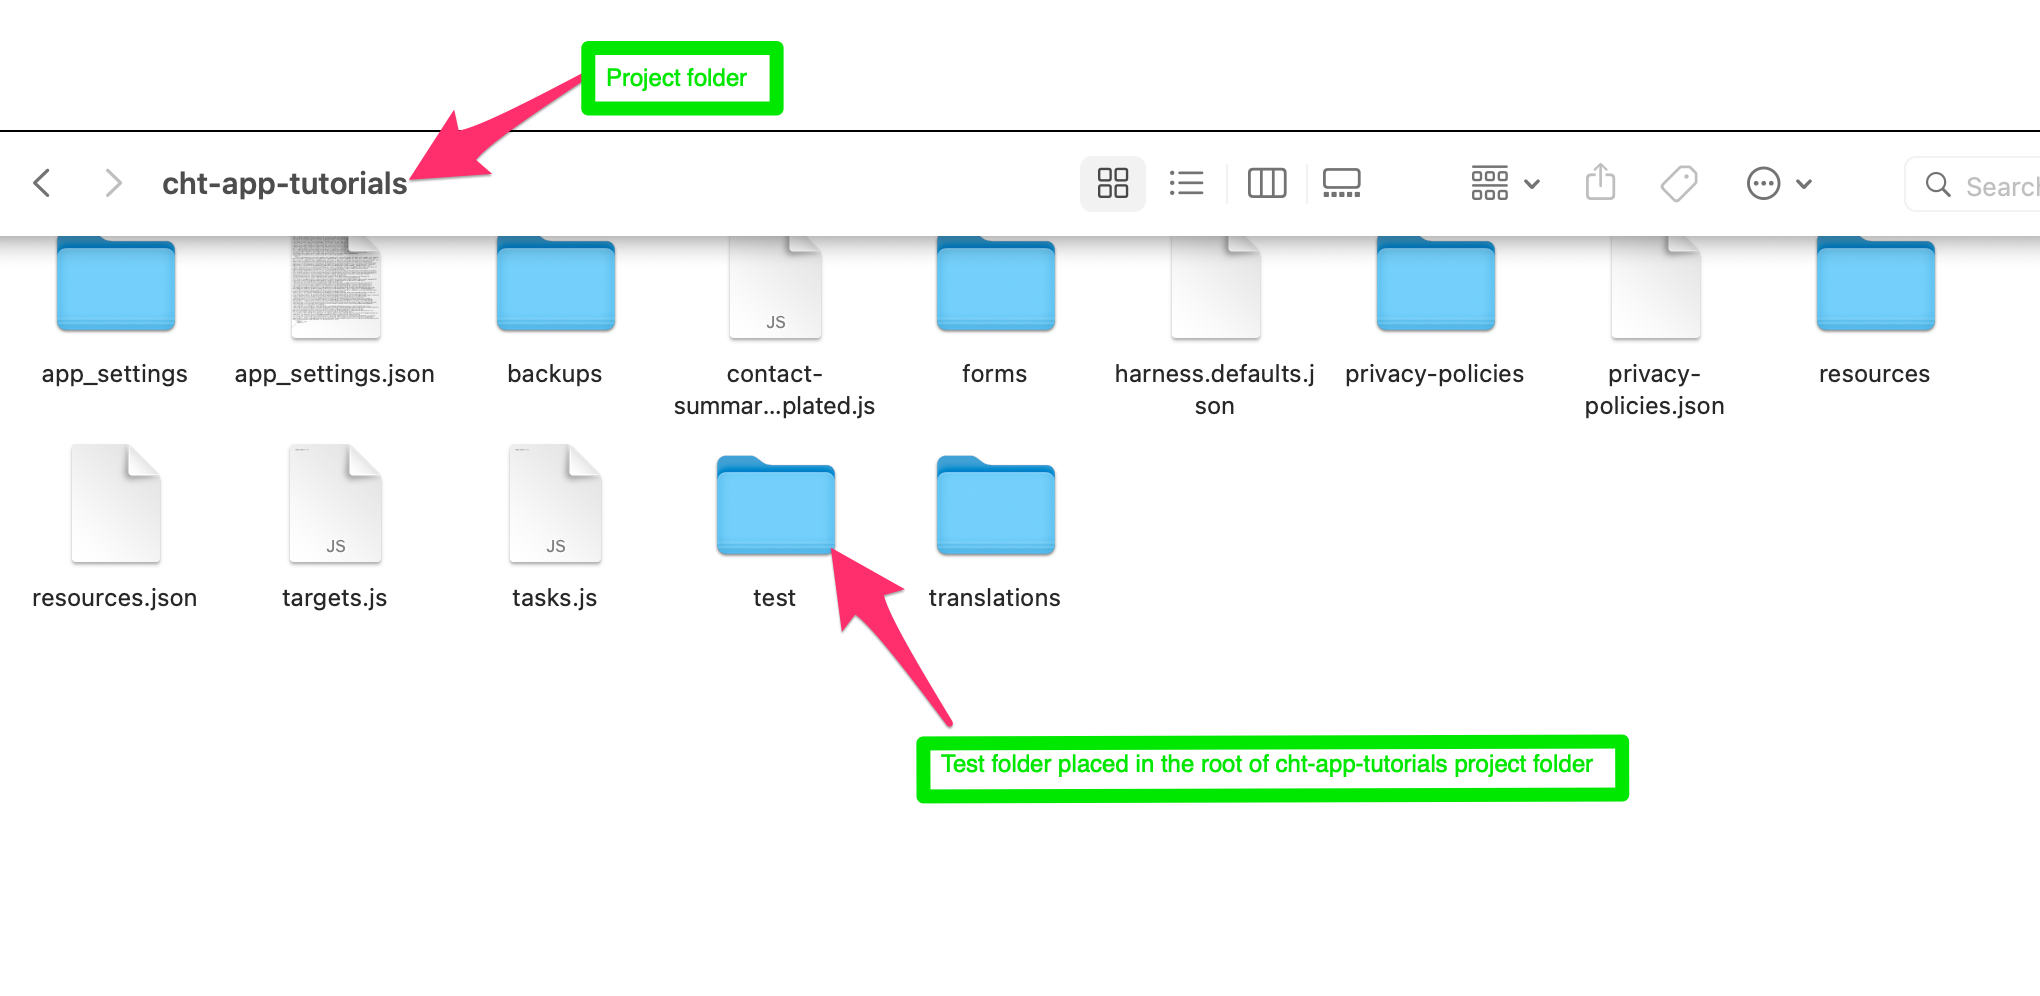
Create a folder in the project root where you keep the tests. You can name the folder yourself. In this case it is named ’test’.
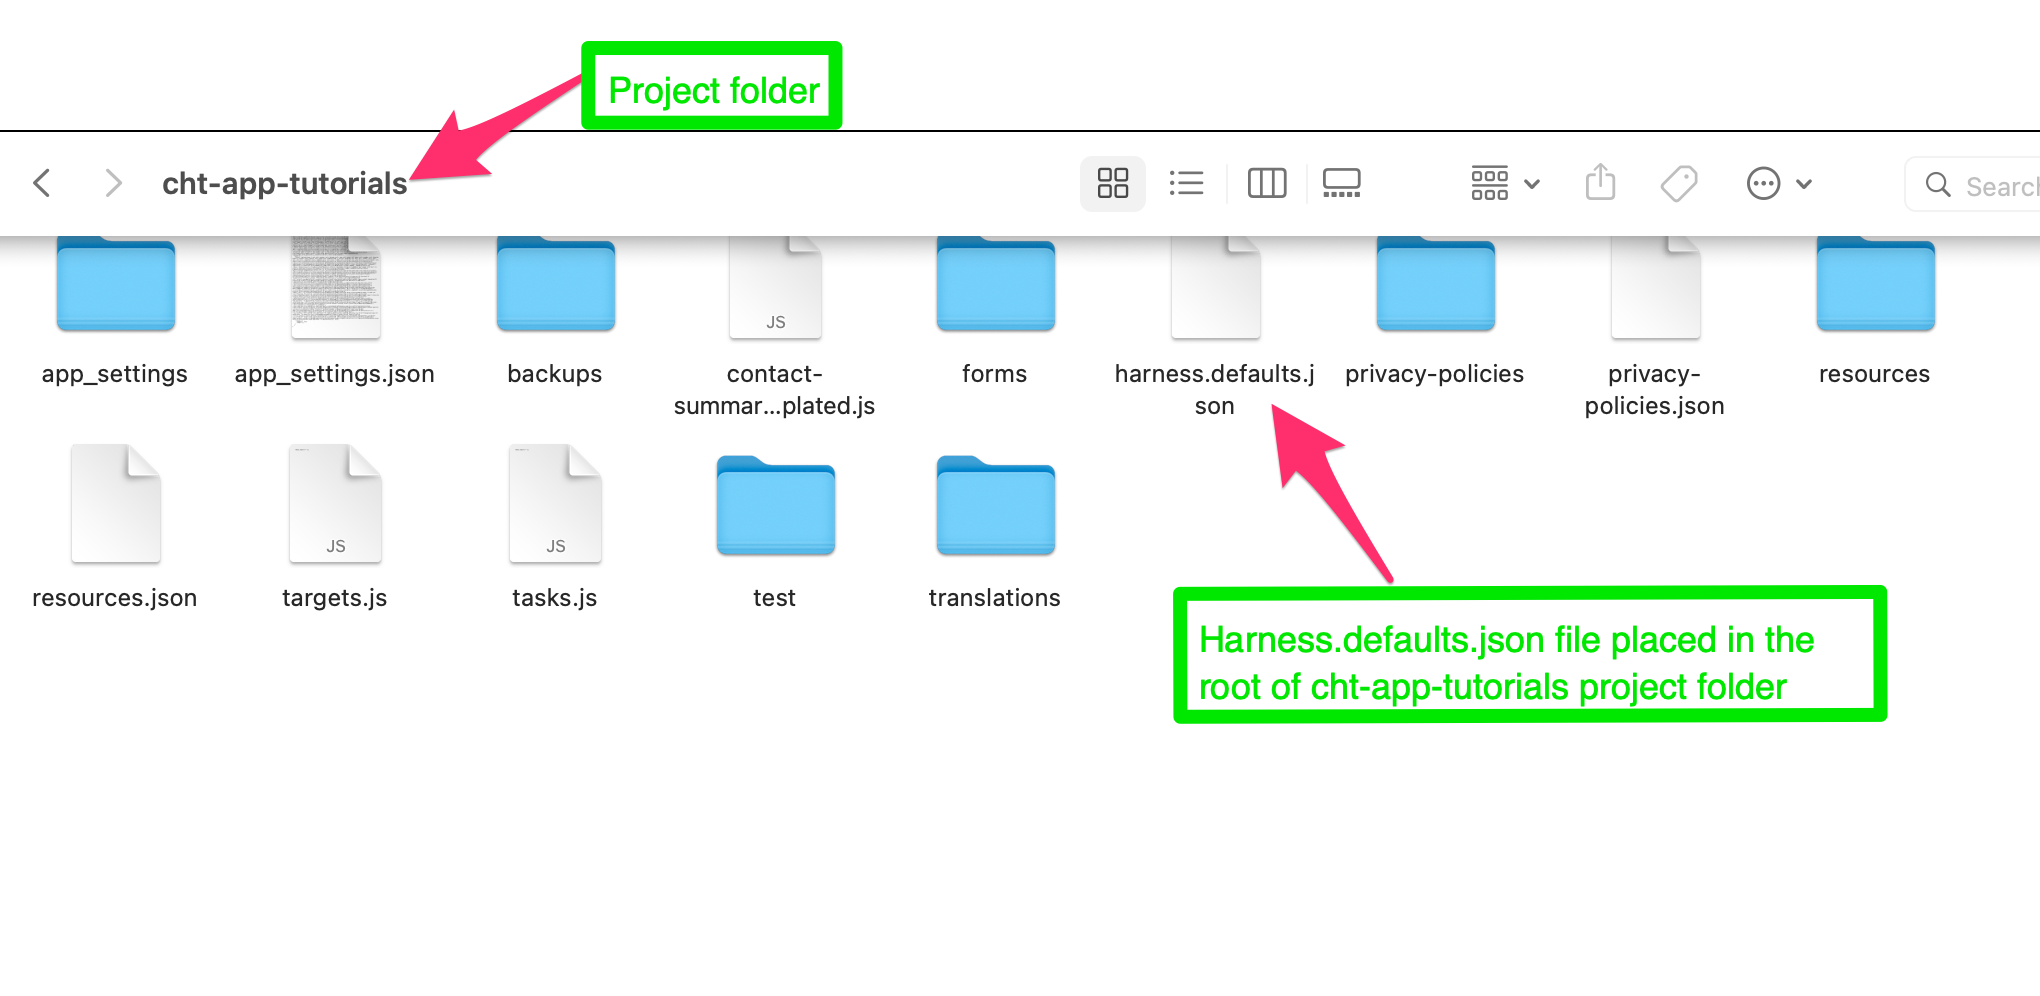
Create a file harness.defaults.json at the root of your project. This is the default configuration file for the harness. Here you can specify the default user, preloaded contacts and reports, and add other settings. Here’s an example file to get you started. You can read more about it here.
Start by adding a file where a group of related tests are written. For example, in the default config, all tests for the pregnancy form are in the pregnancy.spec.js file. The common naming pattern for CHT applications test files is filename.spec.js. In JavaScript testing, spec is short for specifications which refers to technical details of a given application, that must be fulfilled.
Let’s introduce some important sections from a typical test file:
const TestRunner = require('cht-conf-test-harness');
const harness = new TestRunner();
In the example above, we define variables TestRunner and harness. TestRunner imports the Harness class and harness creates an instance of the class that is used throughout the test file.
You can also pass parameters to the TestRunner() when instantiating:
// For detailed console logs
const harness = new TestRunner({ verbose: true });
Other useful options are:
{ headless: false } - Passed to puppeteer, launches browser with GUI. Helpful to see how the form is getting filled.{ harnessDataPath: 'harness.clinic.json'}: Specify different harness configurationYou can find more harness options and examples here.
You need to start the harness before running tests and stop it after the use. To handle start and stop of harness, place following statements in before() and after() hooks of the test suite.
describe('PNC form tests', () => {
  before(async () => { return await harness.start(); });
  after(async () => { return await harness.stop(); });
Any logic that you want to execute before and after each test can be placed in the beforeEach() and afterEach() hooks. This section ensures that the harness is reset to default before or after each run.
In the example below, the logic is to clear the state of the harness and set the date to ‘2000-01-01’ before each test run:
  beforeEach(
    async () => {
      await harness.clear();
      await harness.setNow('2000-01-01');
    });
After each test run, assert that there are no errors in the console.
  afterEach(() => {
    expect(harness.consoleErrors).to.be.empty;
  });
If you want to learn more about these hooks, refer to this Mocha resource. Feel free to customize the hooks as you see fit.
Let’s look at a more detailed example. Below is a test case for the Assessment form that was covered in the previous tutorial:
  it('unit test confirming assessment with cough since 7 days', async () => {
    // Load the assessment form and fill 'yes' on the first page and '7' on the second page
    const result = await harness.fillForm('assessment', ['yes'], ['7']);

    // Verify that the form successfully got submitted
    expect(result.errors).to.be.empty;

    // Verify some attributes on the resulting report
    expect(result.report.fields).to.deep.include({
      patient_name: 'Patient Name',
      group_assessment: {
        cough: 'yes',
        cough_duration: '7',
      }
    });
  });
In line 4 above, the method harness.fillForm() fills the specified form with the given input (answers).
Depending on the form design, the number of inputs to be filled can be large. The inputs are often repeated within a single test or across multiple tests with little or no variation. It is a good idea to keep them in a separate file and refer them from the tests as required. You can also introduce some variations in the inputs using function parameters.
Example: form-inputs.js
module.exports = {
  assessments: {
    no_cough: [
      ['no']
    ],
    cough: (days) => [
      ['yes'],
      [ days ]
    ]
  }
};
In the test below, the inputs are used from the form-inputs.js file above:
const { assessments } = require('../form-inputs');
...
const result = await harness.fillForm('assessment', ...assessments.cough('3'));
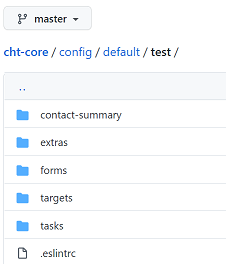
The test files are usually grouped in folders to read and run them easily. One way of grouping them is by creating folders for each of the components that can be tested: forms, contact summary, tasks, and targets.

Test directory structure
| What do you test? | |
|---|---|
| Minimum: | Filling a form with the most common options should not result in any error. |
| Ideal: | All input combinations and constraints are tested with the report fields. |
Previous example demonstrates test for the app form. More test cases can be added by changing the inputs.
You can also test contact forms using test harness. To fill a contact form, use fillContactForm(contactType, …answers).
Example:
const result = await harness.fillContactForm(
  'district_hospital',
  ['new_person', 'William Mars', '1990-08-06', '+1234567891', 'female'],
  ['yes']
);
expect(result.errors).to.be.empty;
expect(result.contacts).excluding(['_id', 'meta']).to.deep.eq([
  {
    ...
  }
]);
When filling a form, you can also test the field constraints. The example below asserts that a form does not accept birth date in the future:
it(`Throws validation error when birth date is in future`, async () => {
  const result = await harness.fillForm('delivery', ['yes', '2090-01-02']);
  expect(result.errors.length).to.equal(1);
  expect(result.errors[0]).to.include({
    msg: 'Date cannot be in the future!'
  });
});
Note: If a form triggers a task, some use cases of the form can be tested when testing the task later.
| What do you test? | |
|---|---|
| Minimum: | Fill a contact form and count the number of fields in the contact summary |
| Ideal: | Targeted tests for calculations of context, fields, cards, etc. |
Contact summary consists of visible components such as cards, fields and a hidden component: context. All these can be tested with the test harness.
Use harness.getContactSummary() method to get the ContactSummary object, which has these properties: fields, cards, and context.
To test the contact summary fields added in the previous tutorial, use the following test case:
const contactSummary = await harness.getContactSummary();
expect(contactSummary.fields).to.have.property('length', 5);
expect(contactSummary.fields.filter(f => f.filter !== 'lineage')).to.deep.equal(
    [
      { label: 'patient_id', value: 'patient_id', width: 4 },
      { label: 'contact.age', value: '1970-07-09', width: 4, filter: 'age' },
      { label: 'contact.sex', value: 'contact.sex.female', translate: true, width: 4 },
      { label: 'person.field.phone', value: undefined, width: 4}
    ]
  );
Here, the contact summary being tested represents the contact that is being “acted on” or the “subject of the test”. To learn more about this, look at the subject property here.
Similarly, you can test the condition cards too. Here is an example for testing the assessment condition card added in this tutorial:
// Load the assessment form and fill in 'yes' on the first page and '7' on the second page
const result = await harness.fillForm('assessment', ['yes'], ['7']);

// Verify that the form successfully got submitted
expect(result.errors).to.be.empty;

const contactSummary = await harness.getContactSummary();

// Verify that there is one card
expect(contactSummary.cards).to.have.property('length', 1);

// Verify the fields on the card
expect(contactSummary.cards[0].fields).to.deep.equal(
  [
    {
      label: 'contact.profile.most_recent_assessment.date',
      value: result.report.reported_date,
      width: 6,
      filter: 'simpleDate'
    },
    { label: 'contact.profile.cough', value: 'yes', width: 6 },
  ]
);
If you follow this code sample to create the pregnancy condition card, the pregnancy context can be tested this way:
const summaryContext = harness.getContactSummary().context;
expect(summaryContext).to.include({
  pregnant: true
});| What do you test? | |
|---|---|
| Minimum: | Trigger and resolve the task |
| Ideal: | One test for each use scenario Code coverage for any arc with an external dependency Negative cases - confirm tasks don’t trigger |
When testing the tasks manually, you need to fill a form. Then to see the task, you need to either change the system date to move forward in time or change the reported date of the document accordingly. These are very tedious and unreliable methods. Using the test harness, you can quickly test the tasks under different scenarios and at different simulated dates.
Every task has a source document (contact or report). When testing, you can mock the source document. Yet, the recommended approach is to fill the source form and then proceed with checking the associated tasks.
Commonly used harness methods when testing tasks are:
harness.setNow(): Set the current mock-time of the harness.
harness.flush(): Increment the current time by an amount
harness.getTasks(): Check which tasks are visible
harness.loadAction(): Simulates the user clicking on an action
With getTasks(), you get an array of Task objects which corresponds to the tasks schema.
Let’s look back at the simple task from this tutorial: Building A Simple Task.
According to the task configuration, these conditions need to be met for the assessment task to be visible:
contact_type of the subject (patient) is: patientcontact_type of the user’s parent is: chw_areaWhen testing with harness, the conditions 1 and 2 above can be set in the harness.defaults.json file. See the lines [31]/building/tutorials/application-tests/#harness-defaults-json-31) and [26]/building/tutorials/application-tests/#harness-defaults-json-26) respectively in the sample file further below.
For the condition 3, let’s look at the task event window in the task definition. As mentioned in the earlier tutorial, the task event is:
So, to see the task, the contact should be created within the last 7 days. You can easily set the contact’s reported date so that it falls within the last 7 days (see line [36]/building/tutorials/application-tests/#harness-defaults-json-36) below).
harness.defaults.json:
| |
Note that the reported_date above stores the epoch timestamp in milliseconds when the document was first created. You can use external website epochconverter to convert the timestamp to and from a human readable date.
After setting the harness defaults, you can now test the task:
// Get the task by title
const tasks = await harness.getTasks({title: 'First Assessment'});

//Make sure that you have the task
expect(tasks).to.have.property('length', 1);

// Load the task action and fill it.
const result = await harness.loadAction(tasks[0], ['yes'], ['7']);

// Verify that the form successfully got submitted
expect(result.errors).to.be.empty;

// Verify that the task is no longer visible
expect(await harness.getTasks()).to.be.empty;
If a task is triggered by a report, then fill in the app form to create report before test:
it('followup schedule', async () => {
  const result = await harness.fillForm(...pncFollowups.registerBirth('2000-01-01', '2000-02-01'));
  expect(result.errors).to.be.empty;

  /* Task should appear 7 days after birth for follow up */
  await harness.flush(7);
  const tasks = await harness.getTasks();
  expect(tasks).to.have.property('length', 1);

  /* Complete the task, task should disappear */
  await harness.loadAction(tasks[0].emission.actions[0]);
  const followupResult = await harness.fillForm(...pncFollowups.followup.healthy);
  expect(followupResult.errors).to.be.empty;
  expect(await harness.getTasks()).to.be.empty;

  /* Confirm a task appears again on the schedule */
  await harness.flush(21);
  expect(await harness.getTasks()).to.have.property('length', 1);
});
You may pass other data from a task to the action form using modifyContent attribute of a task. You can also verify that these data are present in the task.
    expect(tasks[0].emission.actions[0].content).to.include({
      t_follow_up_count: '5',
      t_delivery_date:'2000-01-01',
    });
Testing a target is relatively straightforward. Add a report or contact that increments a target, then check the target values.
| What do you test? | |
|---|---|
| Minimum: | Trigger incrementing of the target Ensure target doesn’t increment when it shouldn’t |
| Ideal: | One test for each user scenario Ensure proper deduplication (particularly for those with emitCustom) |
Use harness.getTargets to check the state of targets. It returns a Target object which corresponds to the targets schema.
To test the first two targets created in the targets tutorial, use this code:
it('assessment this month and all time assessments should show correct counts', async () => {
    //set the current date
    harness.setNow('2000-01-30');

    //assessment form filled
    const result = await harness.fillForm('assessment', ['yes'], ['7']);
    expect(result.errors).to.be.empty;

    const thisMonth = await harness.getTargets({ type: 'assessments-this-month' });
    expect(thisMonth).to.have.property('length', 1);

    //The number of assessments in this month should be 1
    expect(thisMonth[0]).to.nested.include({ 'value.pass': 1, 'value.total': 1 });

    let allTime = await harness.getTargets({ type: 'assessments-all-time' });
    expect(thisMonth).to.have.property('length', 1);

    //The number of all time assessments should be 1
    expect(thisMonth[0]).to.nested.include({ 'value.pass': 1, 'value.total': 1 });

    //Go to next month by adding 2 days (Jan 30 to Feb 1)
    harness.flush(2);

    const nextMonth = await harness.getTargets({ type: 'assessments-this-month' });
    expect(nextMonth).to.have.property('length', 1);

    //The number of assessments this month now should be reset to 0
    expect(nextMonth[0]).to.nested.include({ 'value.pass': 0, 'value.total': 0 });

    allTime = await harness.getTargets({ type: 'assessments-all-time' });
    expect(allTime).to.have.property('length', 1);

    //The number of all time assessments should still be 1
    expect(allTime[0]).to.nested.include({ 'value.pass': 1, 'value.total': 1 });
  });
For targets with type: 'percent', you might want to check for more properties:
  expect(targets[0]).to.nested.include({
    'value.pass': 1,
    'value.total': 1,
    'value.percent': 100
});If you have added helper functions, they can be tested separately.
Example:
  describe('toISODateString', () => {
    const { toDateString } = noolsExtras;

    it('parses a valid date', () => {
      const actual = toISODateString('01/01/2000');
      expect(actual).to.eq('2000-01-01');
});When fixing a bug, write a test which captures the specific scenario being fixed.
This prevents the regression and helps ensure that you’re fixing what you expect.
--grep to only run tests that match a given stringFor debugging the unit tests in VS Code, here is a sample configuration file (launch.json):
{
  "version": "0.2.0",
  "configurations": [
    {
      "type": "node",
      "request": "launch",
      "name": "Run Mocha Tests",
      "program": "${workspaceFolder}/node_modules/mocha/bin/_mocha",
      "args": [
        "--timeout",
        "999999",
        "--colors",
        "${workspaceFolder}/test/tasks/assessment.spec.js",
        "--grep", "should show"
        "--dev",
      ],
      "internalConsoleOptions": "openOnSessionStart"
    }
  ]
}Technical details of CHT app components for app developers
Querying the data which results from an example task. Notes on the performance implications of tasks.